Meet Marvin the Emo Chicken.


The idea came to me while I was on the phone, doodling. I hung up, looked at my concoction and just laughed.


I jumped to the modelling phase and really enjoyed the attitude I got from this guy. I decided I wanted to experiment with different types of materials on the same puppet.


With pieces of foam, I created the basic squeleton of the puppet and covered it with a thin layer of clay and modeled the basic body shape.


I added the details to the body and clothing. Marvin is, at this point, armless because I chose to do the clothing in Latex and the body in felt to really create a contrast of textures for the different materials.


Let the moulding start! From left to right is the progression of casting the first side of the mould: Create walls around the puppet and cover until half of the body is hidden. With the butt of a screwdriver (or anything else that's a bit wide) create grooves that will serve as guides to where the two parts should meet. With a brush, add a thin coat of liquid soap so the puppet can be easily removed from the mould later on. Pour the quick dry plaster halfway through, add some fibres to strengthen the mould and pour the rest of the mixture in until it reaches the top. Let dry completely! Remove the walls and the rest of the clay from the puppet, clean well and re-build new walls around the mould. And repeat!
It's so satisfying when opening the mould for the first time. Marvin 0.1 survived the opening process. Which is great seeing as I would, later on, need him to recast a mould. More on that later.
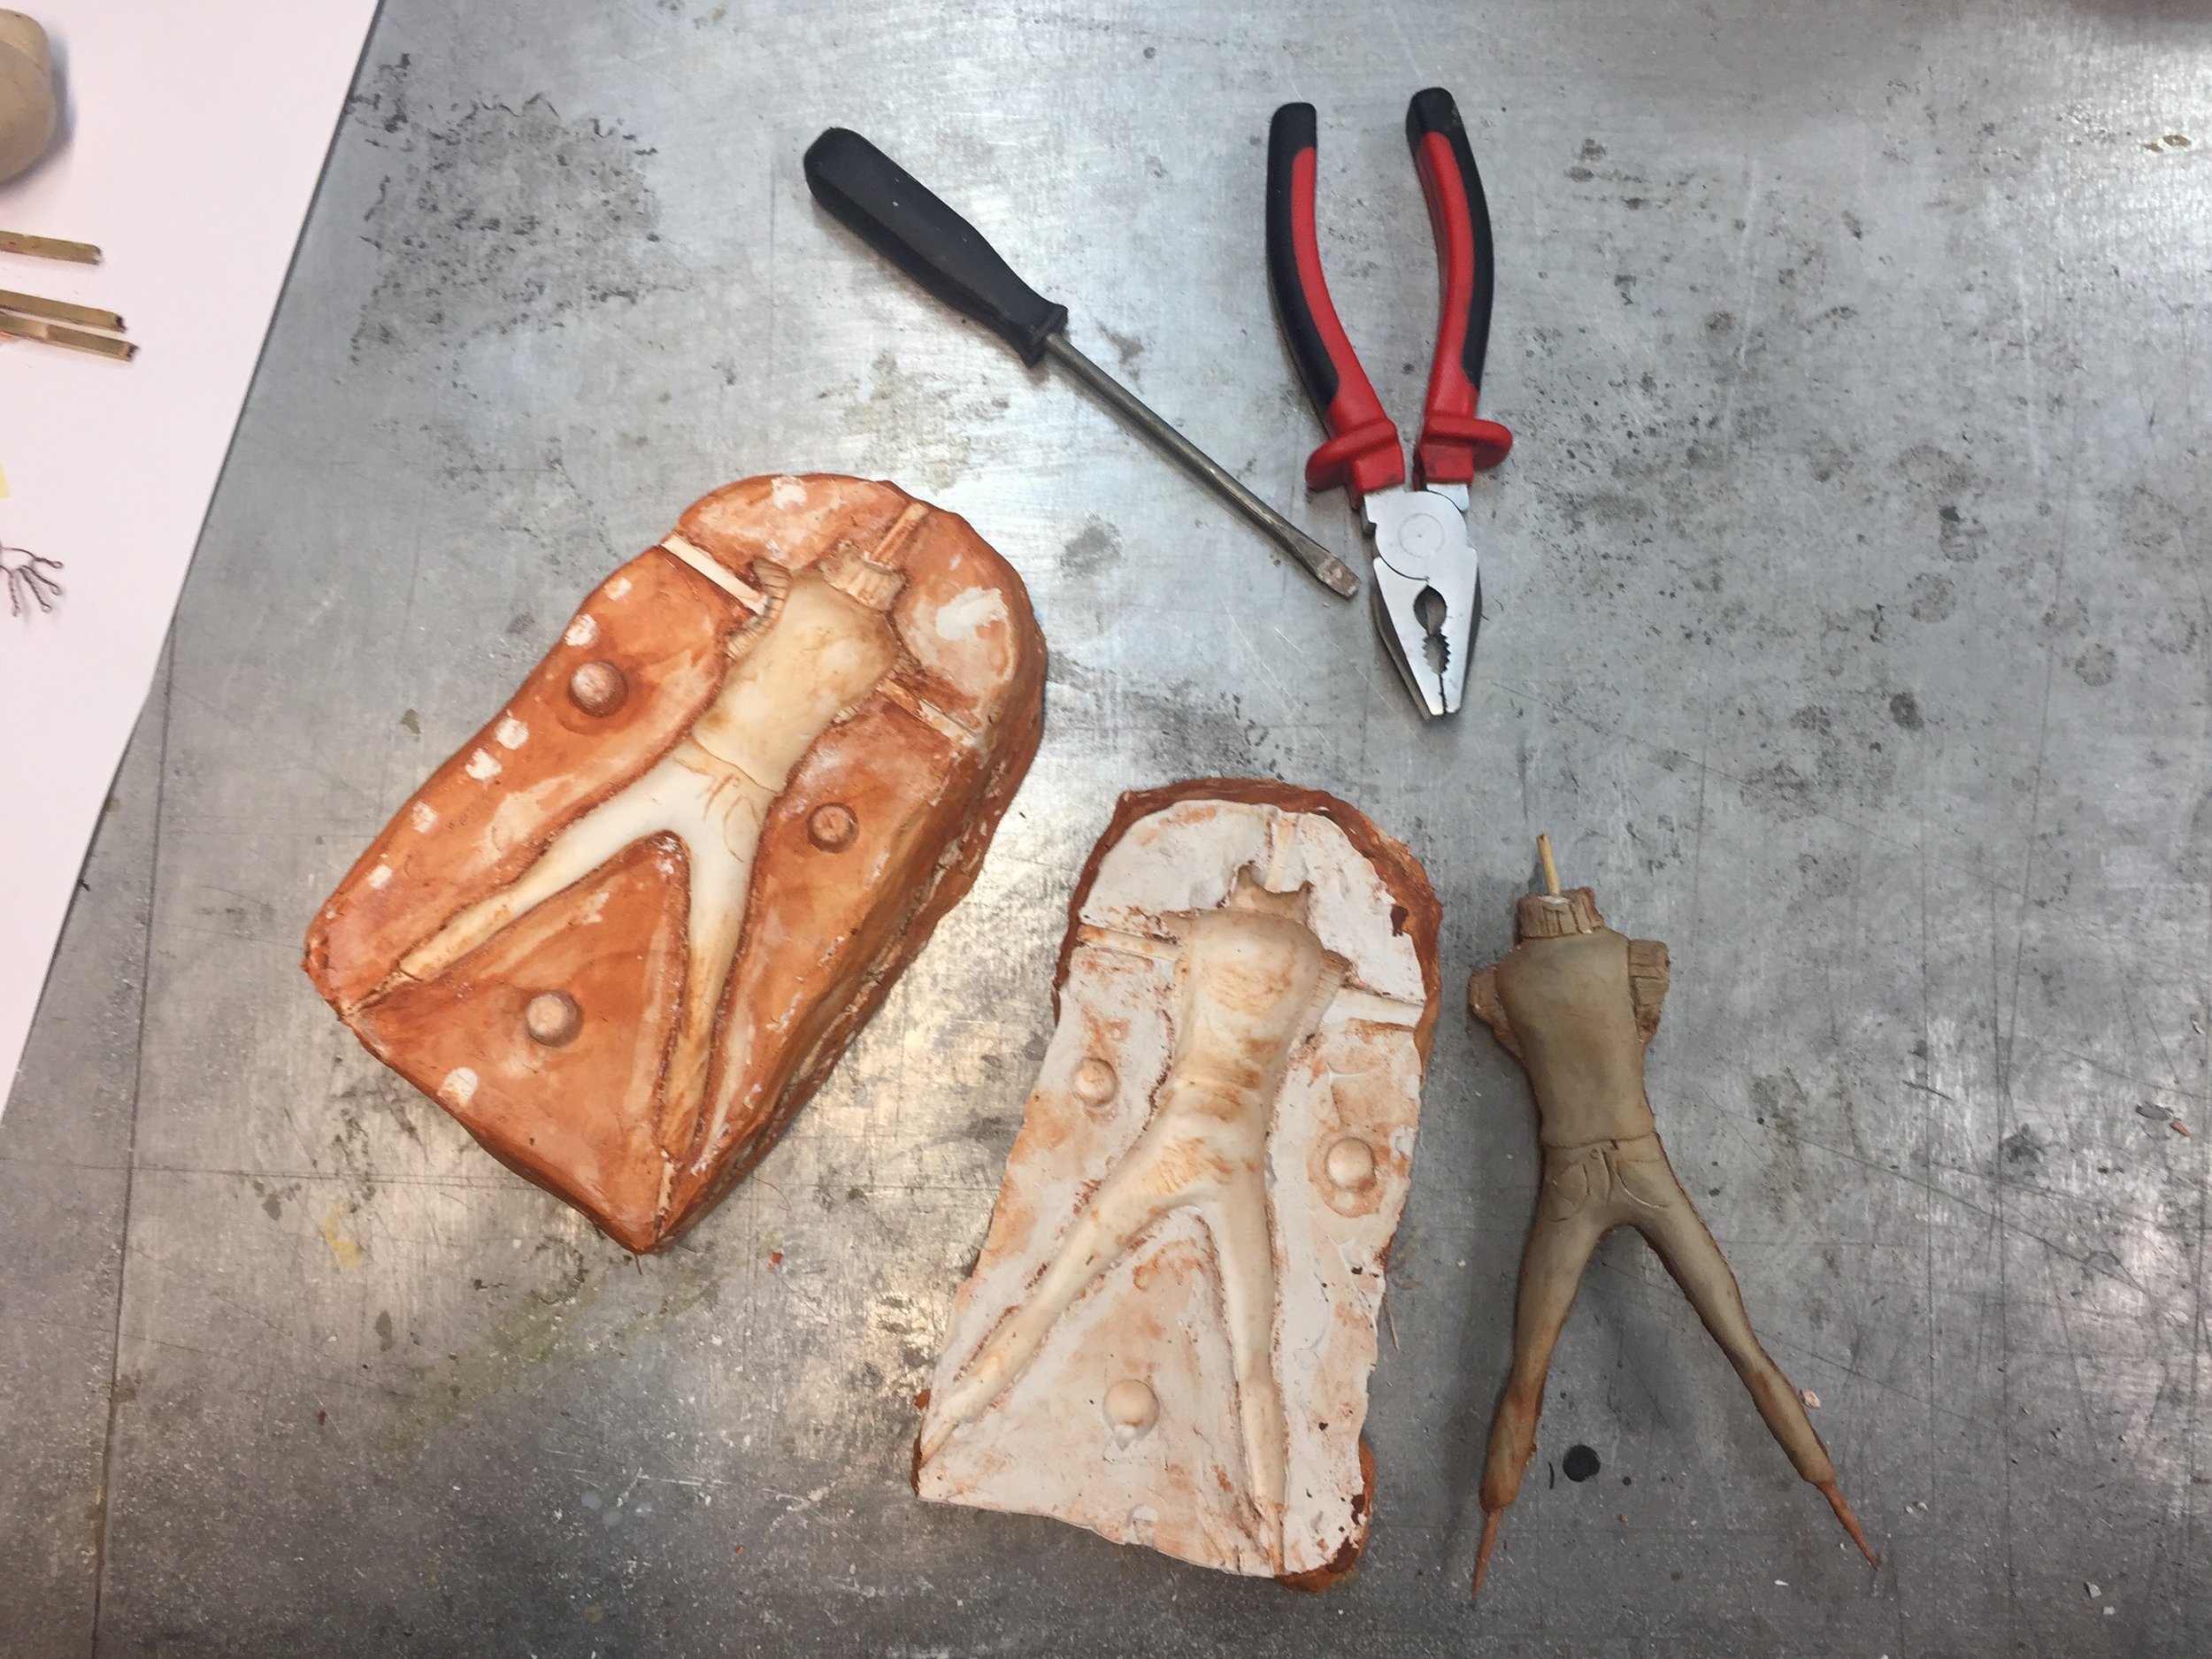
Here's the final mould. All cleaned and pretty. It broke in a few small places, nothing that can't be fixed with a little epoxy glue. It's always better to put the two pieces in an oven to make sure they dry all the way through. To check if it's completely dry, take it out the oven and put it on a surface for a few seconds and lift it. If there's fog on the surface, that means it's still humid.


Carving out the body parts in Balza wood was so nice. I would lose myself to the rhythm of each stroke. I made the hands out of thin copper wire.


Flipping the mould was so stressful and exciting. You can see my reaction right after the flip. You can see me think "did i do it? is it in?" I loved it.

The opening process was quite simple, in theory. Seeing as the latex needed 5 hours to cure, we couldn't wait that long seeing as the studio needed to close for the day. I opened it the next day, at that point, the latex had almost glued the mould completely shut. After a lot of pulling and carving, the mould finally opened but one side did not survive. (That's when I thank god the original model was still intact, all I needed was to recast the mould). Anyway, next step was to trim the excess. That's basically it in terms of latex and moulds. Next up, felting!


Finishing up the rest of the pieces and prepping them to start felting by adding some cotton padding and wrapping it with a thin layer of bandages.


So this was my first felt puppet. The head didn't come out as I had planned in my design but as I was working, another side came out of Marvin. Suddenly Marvin wasn't a teenager with too much angst. He was much older and just pissed off at everything. I loved it. He just grew with every layer of fabric that I added.

Here's the final image of Marvin the Emo Chicken!